You can use lightboxes to add assets from multiple folders to one central location.
Example Use Cases
- You can add images and text documents for different products to a lightbox so you can email your agency a link to download all the items.
- You’re choosing which images to use for a new product brochure and need feedback from your manager. Once the images are added to the lightbox, you can invite your manager to collaborate and comment on the selections.
- You often need to provide referenceable customers, so you create a lightbox of customer logos for easy access and sharing.
This article will review how to:
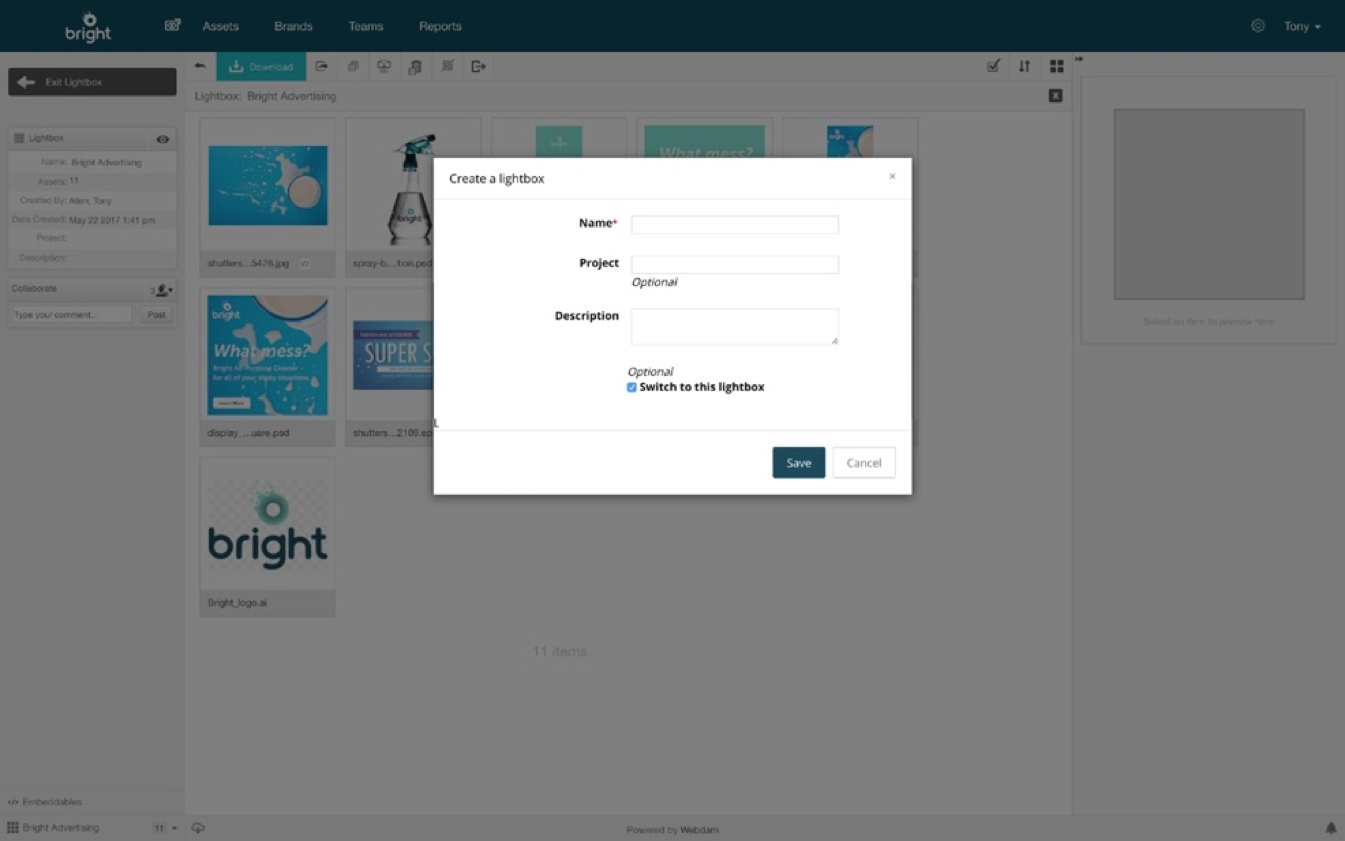
- Click
 in the top navigation.
 - Click Create a lightbox.
- Enter the name, project (optional) and description (optional).
- Click Save.
Watch the following video to learn how to create and use lightboxes in Brand Connect.
Add or Remove Assets From a Lightbox
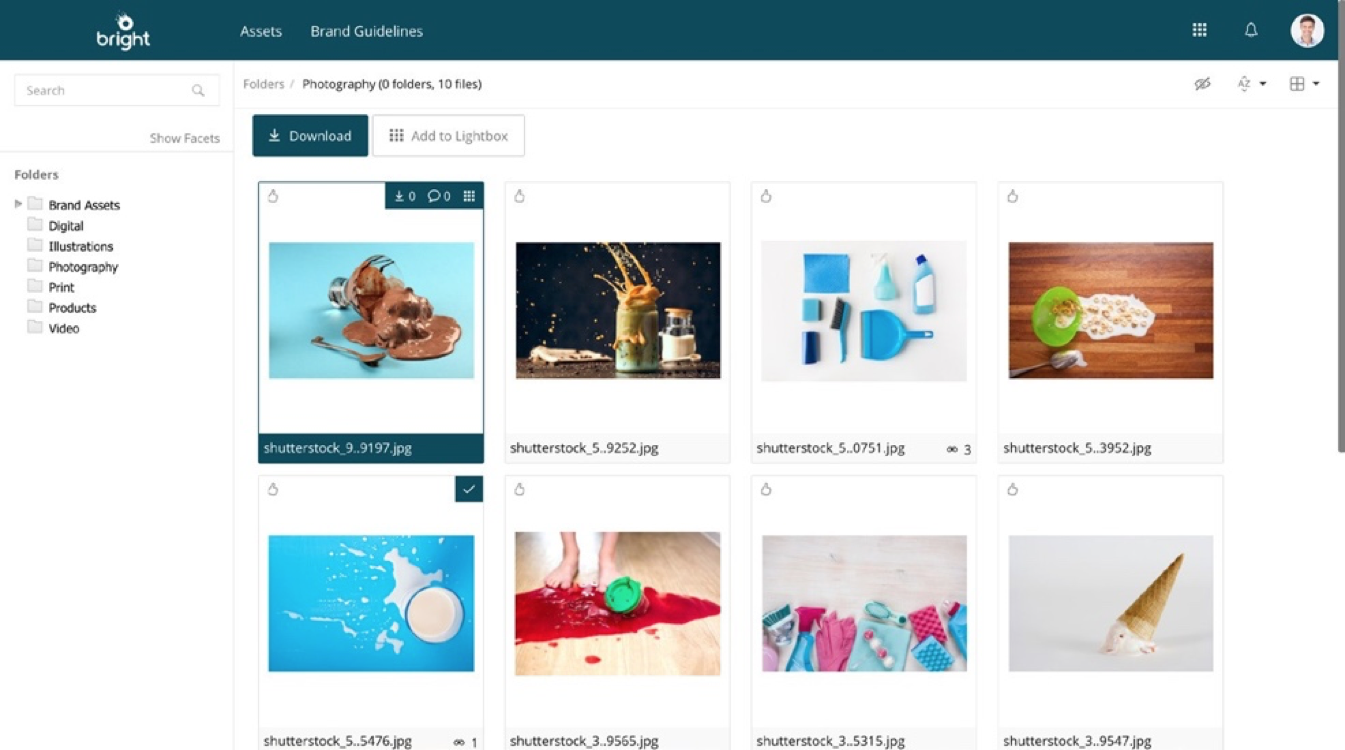
Add assets:
There are two ways to add assets to a lightbox.
- Hover over the asset you want to add and click on the asset thumbnail.
- Select the asset(s) you want to add (for multiple assets, hold down the Ctrl key on a PC or the Command key on a Mac) and click Add to Lightbox on the actions toolbar.
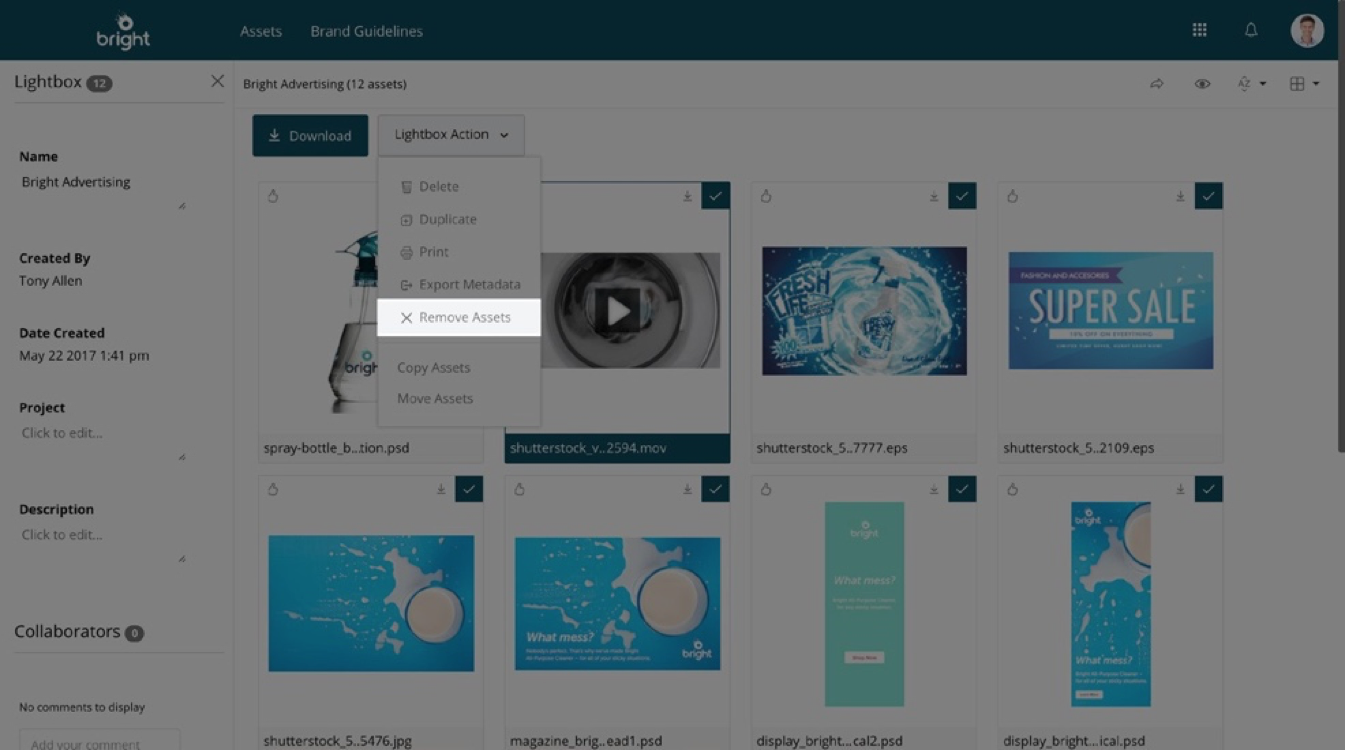
Remove assets:
There are two ways to remove assets from a lightbox.
- Click
 on the thumbnail to remove assets from your active lightbox.
 - From the lightbox view, select the asset(s) you want to remove (for multiple assets, hold down the Ctrl key on a PC or the Command key on a Mac), click Lightbox actions and choose Remove Assets.
Collaborate or Comment in a Lightbox
Collaborate:
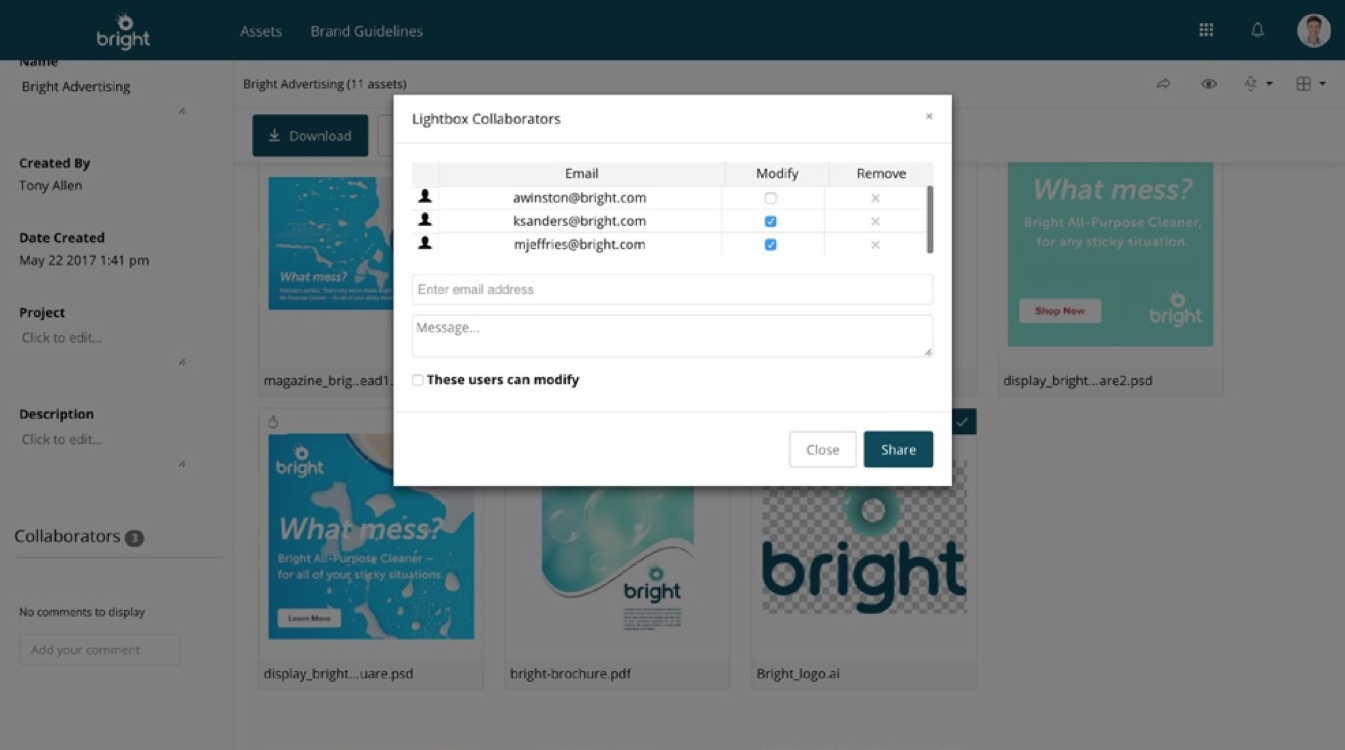
You can invite other users to add comments and modify a lightbox.
- In the lightbox view, click the number in the left column next to Collaborators.
- Enter the email address(es) and a message (optional).
- If you want the recipients to be able to modify the lightbox, check the These users can modify box. This gives recipients permission to edit lightbox information and add and remove assets.
- Click Share.
Comment:
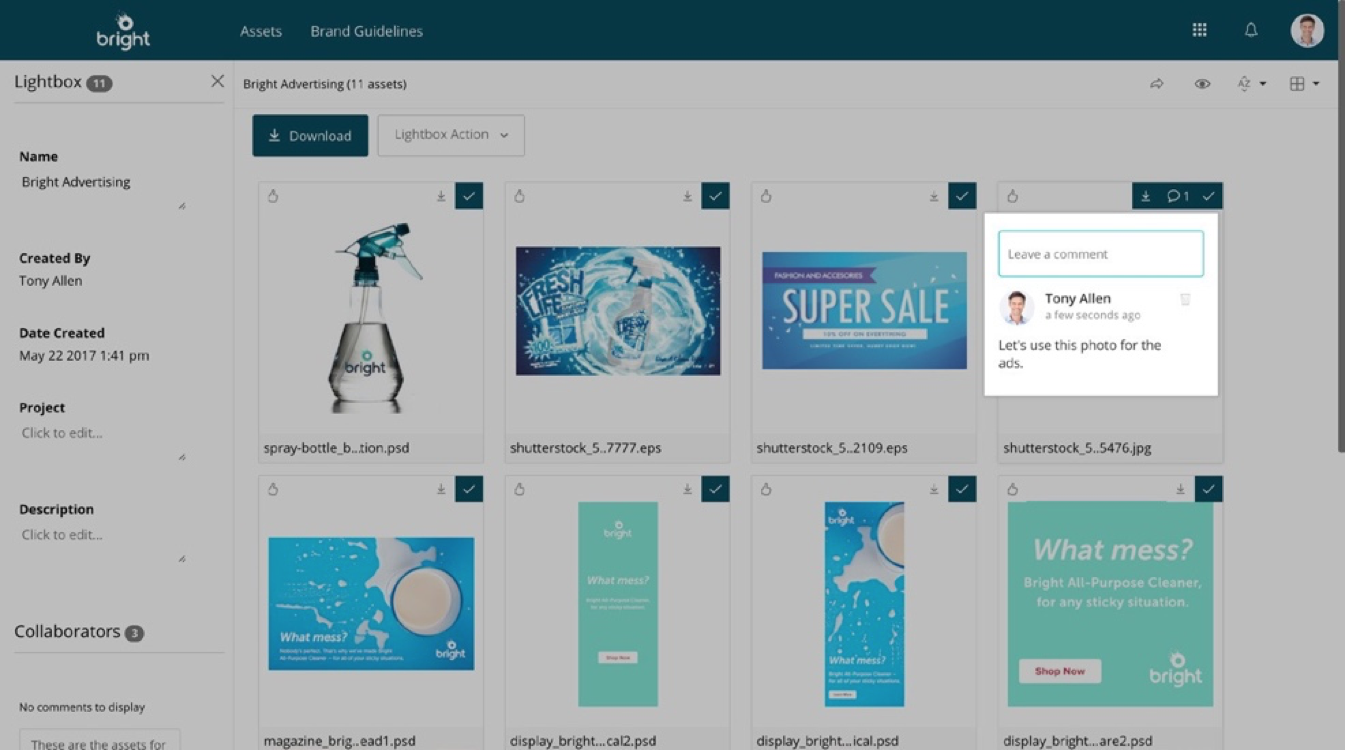
You can add comments to the lightbox or individual assets.
- Lightbox comment: Add the comment in the Add your comment box in the left column of the lightbox view.
- Asset comment: In the lightbox view, click the asset and write your comment in the Type your comment field in the right column. Assets with comments will display a talk bubble icon showing the number of comments. These comments will only be visible to collaborators added to the lightbox.
By default, users will receive an in-system notification and email when a collaborator comments or modifies a lightbox because they will be watching it.
Updated
Comments
4 comments
The article doesn't actually cover how to share a download link via Brand Connect to external collaborators. Can you please explain how? I'm not seeing an option.
Hi Christine,
You'll find a an icon in the upper right corner of the screen for all the sharing options. From there, you can opt to email the download link, or copy it directly to distribute however you wish.
I have successfully shared a light box with someone, who has registered and can access the box. When they attempt to download a file, it says it's submitting a download request. Where is the request sent?
They tried to download a couple days ago, and I have not seen any requests on my end. Does this go to an admin?
Is it not possible to allow them to download any and all files in the box at will?
Hi Nathan,
Where the request is sent depends on how the admin for the DAM has configured requests. By default it will go to the admin email they've established, but they can also delegate folders to other users. The admin can also configure full access to the assets, though that will depend on what type of user is attempting to download and what their permissions are.
Article is closed for comments.