The Webdam Connector for Adobe Creative Cloud (Adobe CC) lets you access assets in the DAM through your creative apps. The connector is compatible with Adobe InDesign, Photoshop, and Illustrator. For an overview of the on adding or removing the connector, refer to Webdam Connector for Adobe Creative Cloud: Installation Guide.
This article reviews the following topics:
- Log in to the Connector
- Using the Connector with Adobe InDesign
- 2018 Connector New Features & Preferences
- Additional information on using the Webdam Connector in InDesign
Note: Webdam Connector for Adobe Creative Cloud is an add-on feature. If you would like to add this to your Webdam subscription, please contact your Customer Success Manager or email success@webdam.com for additional information.
-
Open InDesign, Photoshop or Illustrator.
-
Create a new file or open an existing one.
-
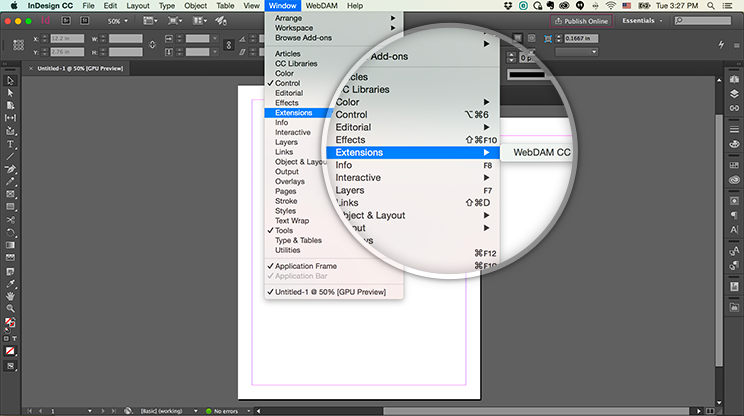
Click Window on the top navigation.
- From the Extensions section, choose Webdam CC Connector.
-
If you are not prompted to log in, click the
 icon in the upper-right of the Connector panel and select Log-in.
- You will have options to log in with a username and password, or to use your organization's Single Sign On application to authenticate
- If you access the application with username and password, click on "Login via username and password". You will be prompted for your credentials on a following page.
- If you access the application with your organization's SSO, enter the URL of your Webdam account. You can use either the Core URL or any of your Brand Portal(s). The application will redirect to your browser for authentication and when complete prompt you back to Adobe CC.
Using the Connector with Adobe InDesign:
-
Setting your preferences - The connector includes options to change the appearance and features when using it with your layouts
- Access
-
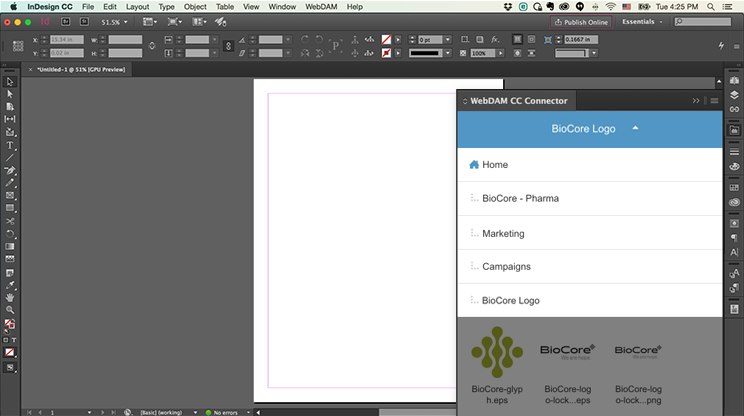
Browsing: Double-click the folders in the Connector.
- View the folder tree by clicking the folder name on the Connector header. To go back a level, click Home or a parent folder. You can also click the
 icon to go back to the previous folder.
- View the folder tree by clicking the folder name on the Connector header. To go back a level, click Home or a parent folder. You can also click the
-
Search: Click the
 icon, enter a search term and click Search.
- Set the toggle to green to refine your search to supported files.

-
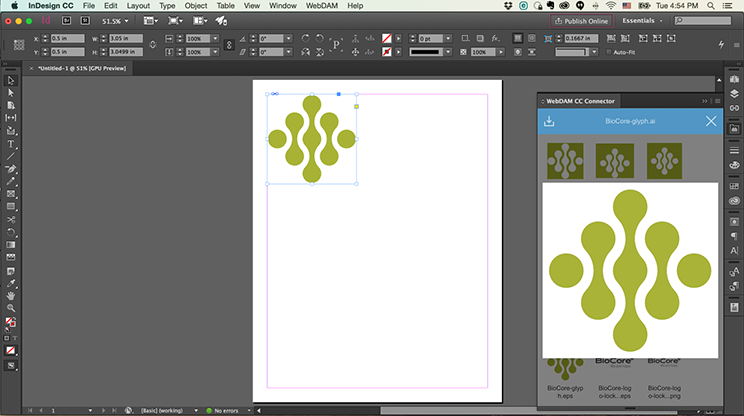
Preview: Double-click an asset in the Connector to see a larger preview.
- Add: From the thumbnail view, drag and drop assets into the document from the Connector.
-
Upload document to Webdam:
- Save the document to your computer.
- In the Connector, navigate to the folder where you would like to upload the document.
- Click the icon on the top-right of the Connector panel and select Upload Document.
- Now your file and any locally linked assets (InDesign only, see below for more information) will be saved in Webdam for you or other team members to access. There’s no need to package the file, because all of your links will pull linked files directly from Webdam.
Additional information on using the Webdam Connector in InDesign:
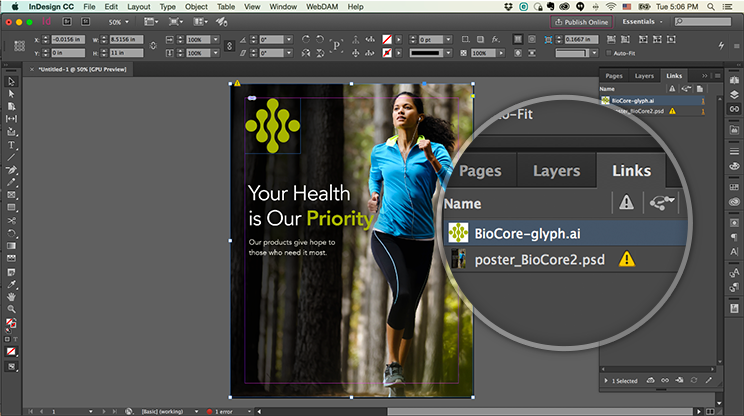
The Webdam Connector lets you drag and drop images from Webdam into InDesign to create direct, URL-based links.
In addition to the above functionality, you may also do the following:
-
Update resolution: Double-click the
 icon in the links panel to toggle between-low res and high-res assets. You can update all links at once by holding down Option (Mac) or Alt (Windows) as you double-click the icon.
-
Updating version: If a new version of an asset has been added in Webdam, you’ll see a
 icon in the Links panel. Double-click it to update to the latest version. (Read more about Version Control.)
- Moving assets in Webdam: There will be no impact on the links if an asset used in the InDesign document is moved in Webdam.
If you need to distribute an InDesign to someone who does not have Webdam, you can use the InDesign Package command with the option to include copies of the assets from Webdam in the output file.
2018 Connector New Features & Preferences:
What’s New? 2018 Features:
The new Webdam Connector for Adobe Creative Cloud 2018 boasts new features and capabilities that are compatible with both the 2017 and 2018 versions of Adobe CC, except where noted. It is recommended to remove previous versions of the Connector before installing any newer version.
Additionally, we recommend clearing any previously Connector preferences after completing installation of the Connector. To clear your preferences, hold SHIFT+CONTROL+OPTION+COMMAND upon launching an Adobe CC application. Click “Yes” when asked if you’d like to delete preference files.
Preferences
The 2018 Adobe CC Connector introduces new Preferences options/settings – to access Preferences,click the icon in the Webdam CC Connector panel and select Preferences. Some of the more notable additions include:
-
Replace selection on place (InDesign only)
- Select an object in the design.
- Select and drag a new asset from your Webdam library into the program. This will replace the object you selected in the design.
-
Use high resolution on place
-
Click the
icon in the Links panel and select Panel Options.
- Select Webdam column and show in link window. This will show if it’s a low or high-resolution link.
-
Click the
- Open file on download - files downloaded from Webdam will open automatically open in the design program.
- Save to webdam_files/download folder – after installing the connector, a folder named webdam_connector_files is added to your hard drive. This folder contains the subfolder downloads, where designs will be saved when this option is checked.
- Asset view - switch between a list and grid view of your files.
Note: the list view allows you to see more of the file name which is helpful when dealing with different versions of a file.
- Write to log file - enable this option if you begin to encounter repeat errors or bugs while using the connector. This will create a .txt file in the webdam_connector_files folder that you can then send to support for help with troubleshooting.
- Version number - shows the connector version you’re working from. This is helpful to have when seeking support or assistance with the connector.
The following options are accessible after clicking the icon in the Webdam CC Connector panel.
- Refresh - refreshes the folder you’re in or will return you to the folder level if you’re in the single asset view.
- Relink to Current Folder - relinks local or shared files to the .INDD file stored in your DAM
- Upload All Non-HTTP Assets - assets used in a design that are stored locally will be uploaded to your DAM into the folder you’re currently browsing or the destination you select.
Drag and Drop
- Single item - open the item in the individual asset view, drag and drop the item into the program.
-
Multiple items - Select the items you’d like to add to the design. Mac users should hold Option and drag the files over, this will open the item(s) in the space.
Get Versions
Allows you to scroll between different versions of an asset (if applicable) and place it into the design. Note: open the item in the individual asset view to reveal the Get Versions feature.
Workstream Integration
Users with an active Workstream subscription will have access to the following capabilities within the connector:
-
Tasks - allows users to view all open (incomplete) tasks assigned to them. From this view users can change the task status, view the project by clicking the project name, or attach the current file to a task.
- To attach a file, click the button labeled “Click to attach the current document to this task”. This will attached the AI, PSD, or INDD file.
-
To add it as a new version, click
.
-
To remove a file you’ve attached to a task, click
.
- Approvals - users can view submitted approvals, submit new assets for approval (the asset must be attached to a task), view the status of approvals (not compatible with Adobe CC 2017) and send reminders.
Updated
Comments
20 comments
Warning! EPS files lose transparency thus you must use AI files.
Hi Evan,
It is recommended that users save ESP files in the EPS10 format. This process should support the transparency.
Anyone had any issues with the following - In photoshop, in the connector, you search for an item, then in the results you cannot drag an item into your file?
HI Meghan - can you please provide more information?
- What OS are you using?
- What Adobe application is affected?
- What version of Adobe are you using?
- What version of the of the connector are you using?
Thank you.
Hi Travis -
MacOS Sierra 10.12.4
Photoshop is the only one I've tried
Creative Cloud 2017
The most recent connector (only been installed a couple of weeks)
I am running into a similar issue as Meghan Howell. When dragging from webdam, into PS & AI, the asset is opened in a new document. When dragging into ID I get "Cannot create the link resource from the given URL."
I am running Sierra 10.12.4 and Adobe CC. Not sure connector version.
Any insight would be greatly appreciated. Thank you!
I'm also encountering the "Cannot create the link resource from the given URL." issue from ID as well. I'm using Windows 10, Adobe CC 2017 and the most recent version of connector.
Thanks for reaching out to Webdam Support!
Here are the most recent versions of the Adobe Connector:
Mac: https://siliconpublishingdev.box.com/s/sc55444olvgjovxyl5xmu6q1uwrk5bic
Win: https://siliconpublishingdev.box.com/s/1e6y8ldox4c55sxzpqeebkpt5tus6tbj
If you’re still experiencing this issue after installing this information, performing the following actions should resolve this issue:
-Close out all Adobe Applications
-Restart computer
-Be sure to sign into computer as the system Admin
If you’ve have any additional issues with this process, please let me know and I’ll be happy to further assist you!
Best,
Hi Sean - I've done all of the above and I'm still having issues. Right now I have InDesign open and when I try to drag something into a doc I'm getting the same error as Patrick (above)
I was getting the same error in InDesign as stated above until I cleared my InDesign preferences (press and hold shift+ctrl+alt then open InDesign) and rebooted my machine. Hope this helps. I DO have the same issue that dragging a file from Webdam into PS opens a new document instead of adding it as a new layer.
I just installed the extension and authorized it but nothing is showing in the window.. None of our folders are showing up.
I got it to work in InDesign but in photoshop, it's not working.
Hi Wendy,
I'll send you an email privately and see if we can get your connector working as expected.
Hi,
When we try using the connector with InDesign (under any user account; varying rights) we're getting a limited list of assets from folders with many more assets in them. We've looked at the assets and can not tell any discernible difference between them. We thought maybe some were not published, or possibly not "active" but that's not the case.
Any suggestions?
Hi Keith,
This is probably due to the fact that at the moment, the connector only displays 50 assets when browsing folders, and 100 when searching. It's a limitation that is currently high in our list of priorities to find a solution for.
I am not authorized to access this page: How to Install the Webdam Connector for Adobe Creative Cloud (https://www.damsuccess.com/hc/en-us/articles/211460806)
I'm having issues with the "Replace selection on place" feature. Images placed from the WedDAM connector always place as a new image even when an image frame is selected in a layout and the asset dragged over and dropped.
Is there a trick to this feature?
Hi Matt,
No trick to it, I'm afraid. It's a feature we're working on at the moment. We should have it working right in a new version of the connector.
Hi,
When I attempt to double-click or drag an image asset out of the plugin within inDesign, the following error appears:
Could not place using connector. [URL to asset] Error App.documents.item(). place HTTPLink is not a function
.
Mac OS10.14.3
Indesign 14.0.1
Hi Mark,
We'd probably need to look at the specifics in that case and make sure it's working as expected. If you're still seeing this, send us a request at https://www.damsuccess.com/hc/en-us/requests/new and we'll see what we can do.
Article is closed for comments.