Box is a cloud storage solution for managing, sharing, and collaborating on digital files. It can store most file types and enables access for individuals anywhere across multiple platforms.
By integrating your Webdam and Box accounts, you can seamlessly connect assets between the two by automatically moving assets in your Box account to Webdam without downloading from Box and re-uploading to Webdam. Non-Webdam users will now be able to add assets to a folder in Box to have them automatically uploaded to their DAM.
This integration is part of the Integrations Hub
This feature/solution requires your Customer Success Contact to enable, but then individual permissions can be done by the Bynder Admin.
Don't yet have Bynder? Start Here!
How to Set up the Integration
Admins will be able to set up and configure the integration.
- Navigate to Settings
> System Preferences > Integrations Hub.
- Click Browse Integrations in the left sidebar, then Configure in the Box section.
- Enter a Name for this configuration and click Save.
- Review the information, then click Next.
- If you've already configured a Webdam connection, it will be selected. If not, select New authentication to add the following:
- Your authentication name: Enter a name for the authentication.
- Client ID and Client Secret: These are the Client ID and Secret from Webdam. If you aren’t sure what yours is, please contact the support team.
- Choose the Webdam folder where assets will be uploaded to.
- Click Next.
- Add your credentials for Box.
- Copy and Paste the Box Folder URL of the folder that you would like to sync into the Box Folder URL section. The format should be like: https://app.box.com/folder/#####
- [optional] Include Subfolders: If you’d like for all assets uploaded to the selected folder’s subfolders to upload to Webdam, check the box.


Note: Large folder structures will slow the total time to synchronize assets from Box. If your folder structure is very large, consider creating multiple Box connections.
11. Click Next.
12. Metadata Mapping: You can automatically add certain metadata values to all assets synced from Box. For example, you can set a Source metadata field to Box for all assets uploaded via the integration.
13. Click Add Mapping.
14. Choose an option under Webdam Field and select a value from the dropdown.
15. In the Value section, enter the desired value that the synced assets should be tagged with.
Note: Assets will also be tagged with ‘Box’, the file ID, and any embedded metadata will be preserved.
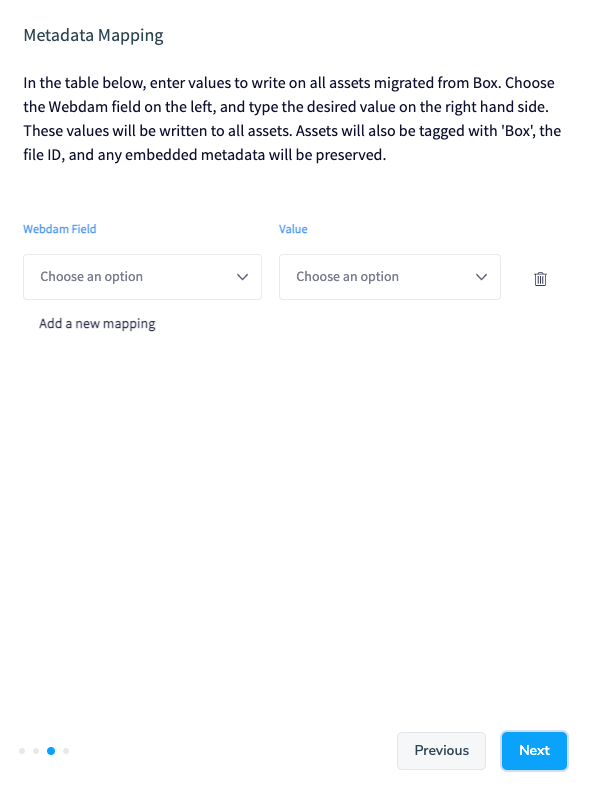
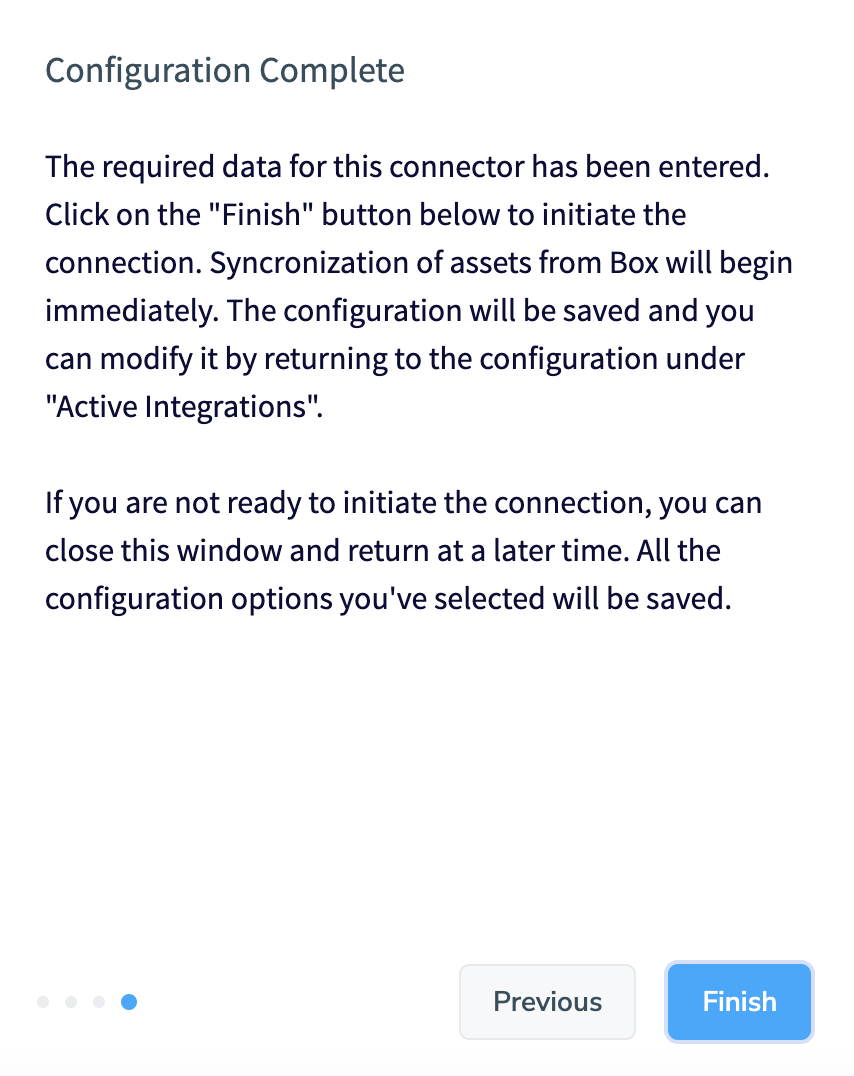
16. Click Next, then Finish.
How to Use the Integration
After configuration, all images for the connected Box account will be uploaded to the selected Webdam folder. Moving forward, any assets will automatically be uploaded to Webdam roughly two hours after you upload them. You can move the folder, but it should not be deleted. If you delete the folder, the upload will fail until you add a new one in the configuration wizard.
If you delete a Box asset from Webdam, it will not automatically be reuploaded to Webdam, and if you delete a Box asset from your Box account, it will not automatically be deleted from Webdam.
Edit the Integration
You can edit the configuration to disable the integration, update your Box settings, or edit your Box credentials.
- Navigate to Settings
> System Preferences > Integrations Hub.
- Click Active Integrations in the left sidebar, then Edit in the section of the connection that you would like to update.
- Make your changes, then click Save.
Updated
Comments
0 comments
Article is closed for comments.