You can use Themes to brand the Webdam experience by customizing the header and email logos and colors.
Note: Themes are only available to customers within Enterprise subscription plans. If you would like to upgrade your subscription plan, please contact your customer success manager or email success@webdam.com for additional information.
This article covers the following topics:
- Configure the header
- Logo
- Colors
- Configure email
- Logo
- Colors
- Signature
Configure the header:
You can customize the logo and colors of the top navigation in Webdam.
- Log in to Webdam.
- Click on the top navigation and select System Preferences.
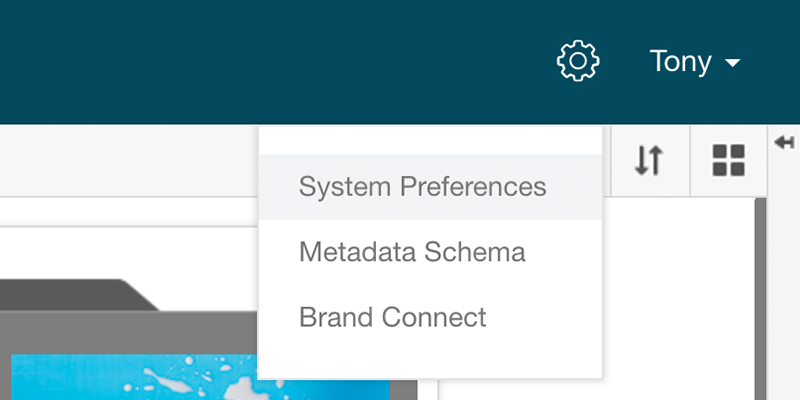
- Click Themes in the left navigation panel.
- Click the dropdown next to Editing and select Header, if it’s not already selected.
- Logo:
- Hover your mouse over the Webdam logo (or your previously configured logo) and click Change Logo.
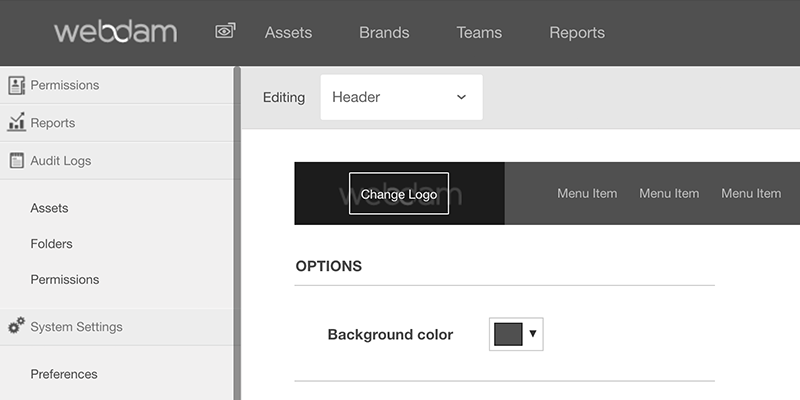
- This opens the Asset Chooser. Navigate through the folders or search for the image you want to use use for your header.
- Once the logo is selected, click Insert.
Note: Use a PNG, JPG or JPEG for the logo.
Colors:
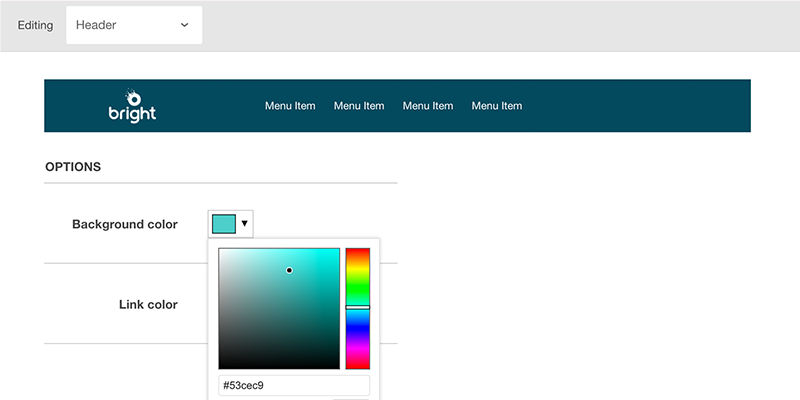
- Click the drop-down menu next to Background color and/or Link color.
- Select a spot on the color chooser or enter the hex code for your preferred color.
- Click Save.
Note: Make sure your link color contrasts the header color, so viewers will be able to see the links.
- Not happy with the changes? Click Reset to restore the original colors and Webdam logo.
- Once you’re satisfied with the changes, click Save.
Configure email:
You can customize the logo, signature and colors of system-generated emails.
- Log into Webdam.
- Click
 on the top navigation and select System Preferences.
 - Click Themes in the left navigation panel.
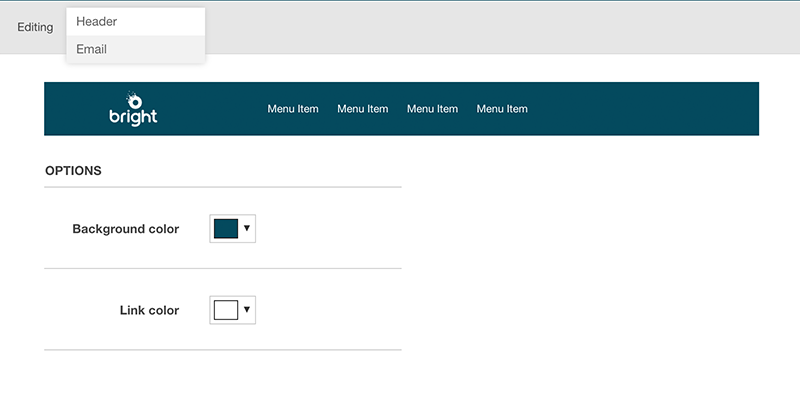
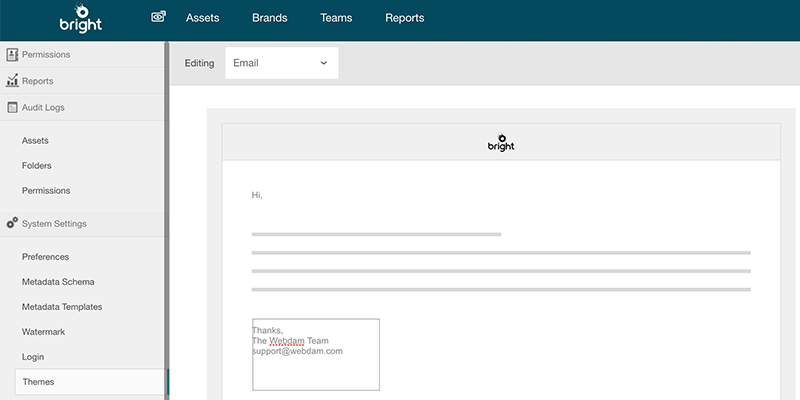
- Click the dropdown next to Editing and select Email.
- Logo:
- Hover your mouse over the middle header and click Change Logo.
- This opens the Asset Chooser. Navigate through the folders or search for the image you want to use use for your email header.
- Once the image is selected, click Insert.
Note: use a PNG, JPG or JPEG for the logo.
- Signature:
- Hover your mouse over the Webdam signature.
- Click anywhere in the black box to edit the signature text.
- Enter the new signature.
- Header color:
- Click the drop-down menu next to Header color on the bottom of the page.
- Select a spot on the color chooser or enter the hex code for your brand color.
- Click Save.
- Click Send Test to have an example email sent to the admin email notification address to verify it looks accurate.
- Not happy with the changes? Click Reset to restore the original colors, signature and logo.
- Once you’re satisfied with the changes, click Save.
Updated
Comments
1 comment
What dimensions should your logo be when adding it into the header panel?
Article is closed for comments.